Friday, September 21, 2012

Straight Cut vs. Print and Cut

I did it! I got this second video made! One of the sweet members on the Silhouette Plus forum asked me if I would make a video explaining the difference between a regular cut and a Print and Cut. She was asked what the difference was by one of her crafting friends.

In the video, I should have explained about the paper piecing done as a regular cut using various colors of paper or as a Print and Cut. I really wish I would have had the time to cut one as a regular cut and one as a Print and Cut to show those whom are new or fairly new to the Silhouette cutting machines.

Remember, if you ever visit my blog and want to ask me a question, please feel free to contact me. I have the email link here, on the upper right hand side. Thanks for visiting. xxx- Debbie


Cutting Stencil with Your Silhouette Cameo

Hi everyone, I'm being naughty today. I'm suppose to be running errands for our trip but, I wanted to take the time to get a couple of videos made. This is the only one I've made so far. I had all sorts of problems. I apologize for the jiggly video on the first part of the video. I didn't use a tripod.

This video will show you how the Cameo cuts the Grafix medium to make beautiful stencils. I purchased the Grafix pack of 25 - 11 x 14 inch sheets at Dick Blick. It's an art supply store. I'm sure it can be purchased other places, like on the internet. This material is .005 in weight.

The video will tell you most of this but the Cameo is rather loud so I thought a couple of things might be missed. :)

Here are the settings I used: Blade - 3, Thickness - 24, Speed - 1, Double Cut


Thursday, September 20, 2012

Embossing Questions Answered


Hi everyone, I've had some emails and comments asking me questions about embossing with the rubber packing sheets. I'll share some of the questions I've received and answer them the best I can.

1.Q.  Is it necessary to glue two of the patterns together to make an embossing folder?

   A. I've cut out single layered shapes and they emboss nicely but, I wanted to make the home made embossing folders a little sturdier so they will last longer and I believe I am getting a deeper emboss.

2. Q. What kind of machine do you use?

    A. I use a Cuttlebug manual die cutting machine which embosses and cuts out die shapes but any kind of machine similar to the Cuttlebug will work. If you go to the post " Embossing Without Shims the Cheap Way" you can see a video I made using the Cuttlebug.

3. Q. The embossing mats shown on the internet showed a piece of lace like ribbon being embossed. Can the rubber mats do this?

    A. Yes, I have embossed a piece of lace, lace ribbon, and single shapes I cut out using a punch and they all embossed nicely. Here is what I did to emboss the lace.

1. First place an "A" plate, the a "B" plate, lace, card stock, then the rubber packing sheet          mat, then a "B" plate. Roll it on through and you should see the pattern of the lace embossed in your card stock.

4. Q. Where can I buy these rubber packing sheets?

    A. They can be found in most hardware stores. I know, Lowe's carries them. I believe they are .98 cents a piece. You will need 2 sheet of the 1/16 inch or one 3/32 inch mat.

5. Q. Can I make my own embossing folders?
   
    A.  You sure can. You can make them by auto tracing a shape or design you like and welding them together or you can open up a drawing program, make the drawing lines thick and draw a design within the area you want to make an embossing folder. For example: I draw a 4.25 x 5.5 rectangle, draw a design within the perimeters of the rectangle. I place the rectangular shape on a different layer so I can delete it and keep only the design. I save the file as a .png file then auto trace it in the Studio program.

If I can help answer any other questions please feel free to email me or leave a comment and I will try to get it answered a.s.a. p. I hope this question/answer post helps.

Swirls, Leaves, and Curls Pattern

I made this design last night and already have the embossing folder made. I have to say; I really enjoyed seeing how nice the embossing came out. I cut two of these files, glued one on top of the other then glued the design to a piece of card stock. I would love to see how some of your embossing projects are turning out. I am honestly thrilled at all of the crafting dollars I'm saving by making my own embossing folders.

This one I created in Illustrator so I have a .svg file format and Silhouette Studio format cutting files.

You can download the .SVG format here -----> Swirls,Leaves, and Curls Pattern

You can download the Silhouette Studio file here ----> Swirls Leaves, and Curls Studio


Wednesday, September 19, 2012

Fallen For You

I found this neat image on Google Images. Thinking of my daughter and the new love in her life, I had to grab it to do an auto trace to create an 8 x 10 framed piece of art for her and her new love. They are an amazing couple. I'm so happy for both of them in the love and respect they have for each other. This fellow may be my new son-in law......shhhhh.... :)

In this cutting file I created a mat to fit inside an 8 x 10 frame. This picture says it all; "I've Fallen For You" and "I'm Nuts About You". It took a bit of manipulation and editing a lot of nodes to get it just the way I wanted it but I think it will be all worth it when I give them the finished project.

If you would like to have this Studio cutting file, you can download it here ----> Squirrel Love

Here is the finished framed "Squirrel Love". I hope they like it.  :)


Tuesday, September 18, 2012

More Backgrounds

While watching t.v. with my hubby I opened my laptop and began playing around in with the wonderful Studio DE software. As many of you already know, I've been on real kick making embossing folders with the backgrounds I'm designing. As always, I would like to share this with all of my crafting Silhouette friends.

Thanks for stopping by to visit. Have a great day!

You can Download this Studio cutting file here -----> Flourish BG


Thursday, September 13, 2012

Bad Cuts Can Be Prevented

Many members on the Silhouette Plus forum and many emails I get are asking the question why their Silhouette Cameo cutting machines are cutting all wonky, tearing the paper, and making their crafting fun not so much fun. For most, this is an easy fix. Making sure you load your Cameo appropriately, checking your cut and page settings are important in getting a good cut. If you've checked all of these and you're still having cutting issues, changing your "Packets" could be the resolve.

This brief video will show you how to help prevent those horrible cuts that can really be frustrating. I'm sure many of you already know this but for those of you whom are new to using the Silhouette cutting machines, you'll find this information useful. Happy crating and cutting! xxx- Debbie


Wednesday, September 12, 2012

Placing Fonts Inside a Circular Path

Kay,(Cleversomeday) from the Silhouette Plus forum posted a screenshot on how to get text inside a circular path. Some members asked if they could get a visual on how this is done so I made this little video tutorial. Later, when I have more time, I'll make another video on welding as I showed in this video.

I hope this is helpful . If you have any questions, please feel free to email me or post your question on the Silhouette Plus forum in "Ask the Forum"


Oh no! I've gone embossing crazy!

Yes, I have gone embossing crazy! Making my very own embossing folders has me cutting with my Cameo and using the glue pen a whole lot. I'm glad I have a back up glue pen...lol.

These are two more embossing folders I would like to share Besides sharing the embossing folders there is one other technique I would like to share. It is embossing with foil and making it look like an antiqued metal. Once you make an embossing folder, grab a piece of card stock cut to the size you want it and then crumple up the foil, then open the foil and mold it to the card stock, lay down your embossing folder, then the foil covered piece of card stock ( messy side down, on top of the embossing folder) roll it through your Cuttlebug or other manual die cutting machine. Once you've done this, it's time to add the black acrylic paint, cover the embossed foiled image with the black acrylic paint, then gently wipe off. Tada! you have a antique/forged metal look. If you want to make and embossing folder for this project that will really hold up; wrap the foil over your home made embossing folder and run it through your Cuttlebug.

I did this using the first method and it seems to hold up but, if I were going to make something to send in the mail; I would make an embossing folder just for this project.

Now, to the sharing . I have two more designs you might like to use to make another embossing folder.

You can download the Squares and Diamonds Design here ---->  Studio Squares and Diamonds Design

Here is the Flourish Design ---> Leaf Flourish

These are some pics of the way they look embossed and the forged metal embossing. I hope you have fun playing with these. :)


Tuesday, September 11, 2012

Mz Daisy Embossing Folder

Okay, this is the last one for today and it is dedicated to one lovely lady Mz Daisy (Diane) from the Silhouette Plus forum. She is sweeter than this design.

I swear, I'm totally obsessed with making these embossing folders. The thrill for me is trying them out and getting such a satisfaction that they work so well. If I want to emboss anything I can and so can you. Play around with your Studio software and see what you can come up with. I'll be anxious to see your designs. xxx - Debbie

You can download the Mz Daisy Design here ---->  Mz Daisy Embossing Folder Design


Halloween Embossing Folders

I'm thrilled to learn so many are having a blast making their own home made embossing folders. Using a Silhouette cutting machine sure makes this project so easy.

Today, I would like to share two more embossing folder stencils.I hope they help make your Halloween projects fun.

For those of you whom make larger cards, remember these can be re-sized in Studio to fit your project needs. These are Studio cutting files for Silhouette cutting machines. I love my Cameo!but, sure wish I could make cutting files for all cutting machine users.

Happy Crafting and Creating Everyone - xxx - Debbie

You can download the bat embossing folder here -----> Bat Embossing Folder and download the Halloween embossing folder here -----> Halloween Embossing Folder

Just a little reminder: To get a deeper embossing you will need to cut both images out and glue them on top of each other then glue them to the size of card stock you would like to make your embossing folder.


Monday, September 10, 2012

Silhouette Made Embossing Folders

Oh boy! This was way too easy. After playing around with the Cuttlebug today I thought I would let my Silhouette Cameo in on some of the action in the craft room so I decided to try and make my own embossing folders using the gasket technique.

This is how I made one. I found an image on the internet of a design, I Auto Traced in in the Studio software,    duplicated it so I would have two designs for one piece of 8.5 x 11 card stock then I re-sized the Auto Traced image to fit  a 4.25 x 5.5 card. I cut out the designs, used my glue pen to glue them together ( this wouldn't need to be done if you cut it out on some light weight chipboard/cereal box  material to cut) then I cut out a rectangular shape to fit the designs on. I made the rectangle just a tiny bit larger than the design and glued the doubled up designs on the card stock. It embossed beautifully and deep.

You can use any design of your choice to make your very own embossing folders. Use the rubber gaskets and tada! you have a new, inexpensive way of making quite a big stash of embossing folders. The great thing about having a Silhouette cutting machine is; you can use the Studio software to make all of the embossing folders you want.

If you would like to have this design to cut out on  your Silhouette cutting machine you can download by clicking on this link ---->Stencil Cutting File

Here is how the embossing turned out. I was hurrying so I didn't line it up like I would if I were actually going to use it on on a card.


Another update, I had the Floral Lace Doily already cut and laying around in my craft room. It was a single layer cut on regular card stock. I thought, what the heck, try it and see if it will emboss. It did! It embossed nice. the two layer ones emboss a bit deeper but this will certainly make do if you don't want to cut two images and glue them together. Make sure you lay the design down first, then the card stock you want embossed then the gaskets.


A Cheap Way to Emboss Without Shims

Wooho! Our Barbara (bdjeepers) from the Silhouette Plus Forum shared some information on some new mats used for embossing without shims. After watching the video, it brought to mind some gaskets I bought at the hardware store. Two gaskets come in a package and they were less than $3.00!

I went straight away to my craft room, pulled out those gaskets, snipped of a piece of ribbon and punched out a scalloped shape to see if my cheapo hardware store gaskets would do the job. Here is a video to show you how it turned out .

Thanks for stopping by. Have lots of fun embossing the day away.


Update: I wanted to share this too. After making the video, I wanted to try using a die from one of my Spellbinders dies. Here is what I did to get this embossed look on the card stock. The gaskets are each 1/16 of an inch I used two so they are 1/8 of an inch.

1. First I cut the shape out and left the card stock in place.
2. Next, I placed the die with the cut card stock still in it on the "B" plate card stock facing up. 
3. Place the gaskets on top of the die, add the "C" plate and roll on through.

This is a tight fit but it will go through and emboss beautifully! Below are some pics of the die I used and the embossed piece. I bet some of you thought it would break....lol. My Cuttlebug wasn't stuck to the table surface and it was tight but I knew my dear old Cuttlebug could handle it. :)

Update 2 :This is a link to the type of rubber gaskets I used. It's called Rubber Sheet Packing


Sunday, September 9, 2012

Little Green Monster Card Video

Hi everyone! I promised I would make a card with the little green monster cutting file. You can download this file right under this post.

I wanted to give this card some animation so I made a home made wobble. These are so easy to make! I made a video on how to make them some time ago but when I changed things on my YouTube channel it disappeared.

Making a Wobbler

To make a home made wobbler all you have to do is use some thin wire and wrap it around a pencil or something round like this. You can make them whatever size you want or need. You cut two circle out and poke a hole in the center. Fold the end of the wire down on the one circle and tape it into place, then poke the wire from the other end into the other circle and do the same thing to the other end. Glue one end to the image you want to wobble and the other to your card stock and get a giggle when you see your image come to life with your home made wobbler. A 26 to 28 gauge wire should work well

Here is a YouTube link showing a home made wobbler and discussing the gauge of wire to use. I love YouTube! ------> Wobbler Video

I just found another terrific YouTube tutorial. She makes hers differently than I do but they work great!

How To Make A Home Made Wobble


Saturday, September 8, 2012

Little Green Halloween Monster

In the spirit of Halloween ( coming sooner than we think) and this infection I can't seem to get over so I dubbed it the "Greeny Meany Monster"...lol I was inspired to make a "Green Monster cutting file.

This cutting file has two images so one can be done as a paper piecing and the other a Print and Cut. Remember, you don't have to do it as a print and cut. you can use those scrap pieces to cut out each colored shaped on colored card stock. If I get the chance to make one today, I'll add a home-made wobble to it and have a dancing monster for a Halloween card. I'll make sure to share the results.

You can download the "Green Monster" here ----> Green Monster Studio Cutting File

Frightening isn't he?......LOL


Friday, September 7, 2012

Swan Gift Box

This morning while browsing blogs I hopped over to Audrey's blog Cute and Some to find she had made this gorgeous swan box. Well, I fell in love with it. Audrey, with her generous, kind, and sharing nature not only provided an awesome tutorial but she shared two different types of cutting files. Sadly, I couldn't use either type of cutting file with my Cameo so, I figured a way to make it. Audrey provided some great pics in her tutorial so I did a screen shot of the Swan pic, opened it up in Studio and grabbed that sweet drawing tool. It took a little while to get it all drawn but, it was worth the trouble. When I finished I made my way back to the craft room and cut away. I had to make a couple of small adjustments after the first cut and then cut out the second box. I was delighted with the way it turned out. Thank you Audrey for sharing you idea and inspiring me to make one of these.

As many of you know, I'm not feeling too well these days. Round three of antibiotics! Crafting is definitely good for the soul. I made myself get back to that craft room to make this box. When I was done; I felt so good! Even though I'm tired as tired can be and this horrid cough keeps me worn out it was uplifting to create and make. The best feeling is; I get to share this cutting file with all of you Silhouette users. I love being able to share. I hope all of you try this box out. It would be great for wedding, bridal showers, and for that little girl who loves everything delicate and sweet.

I embellished it by making some spiral rolled roses, cut out some little leaves with the Cameo, embossed the lines in them and dabbed them with a darker green ink. When I got all of the roses and leaves glued on, I added some white feathers for flair. Next time I make one; I'll be adding some glitter.

You can download the Studio cutting file here -----> Swan Studio File


Thursday, September 6, 2012

Crayon Box Designer Style

With all of the back to school things going on around the internet and having my grandchildren coming over tomorrow to spend the weekend, I've had crayons on my mind. Today, I designed a crayon box cutting file with the Studio software for Silhouette cutting machine users. It will  hold a 24 Crayola crayons. The box of crayons shown below will probably be gifted to my sister whom teaches the littlest ones. I plan on making a couple of cute themed ones for our grandchildren.

I don't want to bore anyone but I know some readers like a few details on how something is made so here I go. :-) First the box was cut out on some heavy card stock, then I slid the box portion of the cutting file to the side to cut out the decorative paper. This is a light weight designer paper so I had to change the cut settings. It worked perfectly. I have a huge box of this 12 x 12 paper. It has all sorts of pretty designer paper in it and it was a steal of a deal. Don't you just love to find those deals you can't pass up.

The band was made with some scrap paper I had laying around and the ribbon rose was made with a piece of scrap ribbon. There are lots of tutorials on YouTube on how to make the ribbon roses. Since I also had a piece of green scrap paper I hand cut a couple of leaves then embossed lines on them to make a more realistic looking leaf. After I embossed the leaves, I added some ink to bring out the lines in the leaf. Last, I placed three sparkling rhinestones to add the bling I love so much. This was another quick and easy project. I hope you all get the chance to make your own designer crayon box. I would love to see what you made. You can always email me the pic so I could show off your work here on my blog.

I almost forgot to mention this, this cutting file will work with the original Silhouette and the Silhouette SD.

Happy crafting my blog friends!

You can download the crayon box Studio cutting file here ------> Crayon 24 Count Box


Oops....I lightened this picture up a bit too much. The one below shows what the colors really look like. 


Monday, September 3, 2012

Back to School Freebies!

Here they are! In collaboration with the wonderful sharing and giving Barb Dersken aka Mrs. Miles from her fabulous blog The Life of Mrs. Miles we are offering some sweet back to school freebies to celebrate students, educators, and all of you amazing crafters out there whom love to create and give.

Before I get started loading up some freebies, I would like to send a great big hug and thanks to Barb for inviting me to collaborate with her on this sharing and caring project. We both love to give and enjoy all of the creative and kind people whom enjoy making things that bring smiles.

I have a bunch so hang on. First up, is this little back pack.

Back Pack Studio Cutting File Download


For those with the "Write" stuff here are some pencil boxes. I can see giving these to a favorite teacher or hard working student with a tag saying; "You have the write stuff." A little tip: You can ungroup this  box and use just the pencils as a Print and Cut.

Pencil Box Studio Download


Ready for some Print and Cuts? These can be done as Print and Cut or they can be made as paper piecing by cutting various colors of card stock for each shape.

This one is is a little Fall sign for a teacher's classroom.

Welcome to Our Pumpkin Patch Sign


What would a classroom or craft room be without scissors, glue, and paint?

Scissors, Glue and Paint Studio Download


The wheels on the bus go around and around with this next Print and Cut or paper piecing freebie.

School Bus Studio Download


Now it's time to get to school with this Print and Cut school house.

School House Studio Download


Don't forget to hop on over to Mrs. Miles Blog to grab another fun "Back to School " freebie.

Hugs to all!

Sunday, September 2, 2012

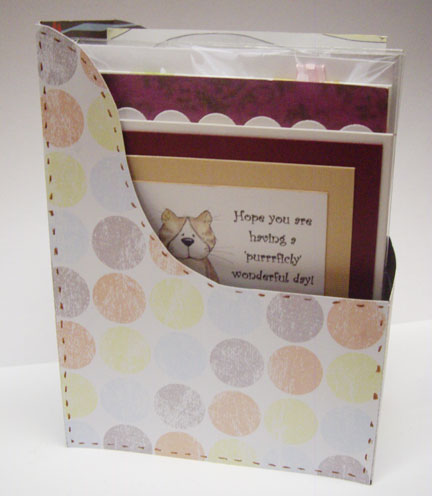
Folio Box Cutting File

While I was taking a little break from my re-organization project I popped in over at the Silhouette Plus forum and saw a post where one of the members was looking for a folio box. I looked at the picture she posted and went to the good 'ol Studio software to see what I could come up with.

Here's how it turned out and here is the link to download the Studio cutting file -----> Folio Box Studio File

This folio box can be re-sized to fit on letter size paper. I hope this little box comes in handy. I cut two of them and they are now filled with mail. :-)

Happy crafting everyone!


Saturday, September 1, 2012

Haunted House Cutting File

Hello friends. I have something so cute to share with all of you. It is one of the cutest Halloween crafts and I'm so happy to announce it was our very talented Kelly from her blog Finding Time to Create whom made a Halloween delight to share with all of us.

Kelly asked if she could use one of my cutting files for the decoration.I was flattered she asked since she is one crafter whom's talent I would love to have. After Kelly posted her Halloween Treat bottle I was asked if I would share the cutting file she used here on my blog. Of course I will! I love to share.

Please check out Kelly's blog to see all of the things she did to make this cute as can be Halloween Treat Bottle. Every detail is worth taking a look at. Honestly, it is soooo... impressive.Everything Kelly makes is inspiring. I just love what she did! I know I'll have to go get some of those bottles. This will be a huge Halloween hit for any age.

Here's the link to download the cutting file.----> Haunted House Studio Cutting File You can also make a Halloween Tea Light with this file but Kelly's bottle is too cute to pass up on making.

Here is a picture of Kelly's creative and adorable Halloween Treat Bottle. She is so dang talented.Did I already say this?....lol Okay, I just have to add one more little brag about Kelly; I love everything she makes.

Thanks for stopping by. Happy crafting everyone!