Saturday, April 27, 2013

Newest Cutting File Share and Inspirations

I would like to introduce a very talented who has a fabulous blog called Scraps of Faith. Some of you may have already been to her blog.If you have already been to Kim's blog I know you will agree, she is super talented. I'm honored to be able to introduce her and show off one of her creative cards. She is truly inspiring.

Kim has such a talent in creating beautiful cards which appeal to anyone who sees them. I've helped her with a couple of projects. One of her adorable cards is the baseball card below. She asked me if I could make her a set of bleachers for her to cut out with her Cameo. I found her request to be a neat challenge so I got to work drawing everything in the Silhouette Studio Designer Edition program. I think it turned out pretty nice but really loved it when I saw the what Kim had done with the bleachers. She has such a creative mind.

I've made a couple of other cutting files she will be using in other projects. I'll make sure to share the cutting files here on my blog.

Please take a little time to visit Kim's Scraps of Faith Blog  for some eye candy. You'll be delighted and inspired. I always look forward to seeing her next creation.

If you would like the Bleachers print and cut cutting file you can download the .svg,.dxf, and Studio formats all in one zipped folder ------> HERE

Happy Crafting Everyone!


Monday, April 22, 2013

Cards Shares

 The communications I share with ladies I've met from having this blog, YouTube and the Silhouette Plus forum has brought me new friendships and so much joy.Meeting people from all over the world brings us all a little closer. I wish we could all be next door neighbors.

It's been really great meeting so many wonderful people whom share common interests. I've learned new things and cherish each and every person I've met.

Today, I am honored and so pleased to share a couple of cards of two very kind and sweet ladies I now call friend. They were so sweet to take the time to photograph and send pictures they made of cards using the files I've shared.

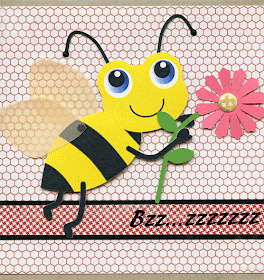
The first one is by Irena. She used the Print and Cut bumble bee. The second card is by Lyn from South Africa who made an adorable baseball card using the mirrored steps cutting file.

Thank you Irena and Lyn for sharing your lovely creations. I am truly blessed to call both of you friend.Love and hugs, Debbie

Irena's Bumble Bee Card

Inside of Lyn's Baseball Card


The front of Lyn's Baseball Card


Friday, April 19, 2013

A Window Tunnel and Flower Pop Up Card

I've been busy for the past couple of days working on two fun cards. These files will be shared with anyone who makes a donation this month or the first two weeks of next month.

The "Window Tunnel Card" open to a dimensional window view. It looks as though you were looking out a window. The " Flower Pop Up Card" will thrill any Spring lover with a bunch of lovely little flowers and grass that pop up to reveal a garden of flowers.

I made these two samples and already know who they will be given to. My mom will be getting the "Window Tunnel Card" for Mother's Day. I embellished the front with roses, rhinestones, and butterflies all laid on a scalloped mat. This card has all of the things my mom loves.

The "Flower Pop Up Card" is embellished with a lace flower border. The Frog sketch file and lace flower border were both shared here. I used one of the extra flowers, stems, and butterflies I cut for the Mother's Day card to embellish the front. The frog is on a home-made wobble so he wiggles back and forth when he comes out of the envelope. I sketched the frog, cut him out and colored him with Spectrum Noir and Copic markers.

The butterfly and little girl images are not a part of the card cutting files. They are copyright protected. You can use any pretty butterflies or images you have to fill up the area marked for images. I used a bone folder to scored down the center of the image for the "Window Tunnel Card".


Tuesday, April 16, 2013

Sketches and PnC

Today I wanted to share some sketches and a cute bumble bee PnC( print and Cut). All of these were drawn with the Studio software.These were made so I could share another wonderful aspect of using the amazing Studio software. I use the Studio Designer Edition. As I've said in previous blog posts; the Designer Editon is well worth the additional expense and I'm in no way affiliated with Silhouette.

 The Home Sweet Home, frog, and Hello Kitty are sketches I sketched with my Cameo then colored them with Spectrum Noir and Copic markers. I don't use these markers nearly enough and really need to play around with the more often. I've seen so many beautifully colored images done with Pro Markers, Spectrum Noir, and Copic. If I had to pick a favorite between the Spectrum Noir and the Copic; I would choose the Copic. The Spectrum Noir makers run easier. I removed the caps off of some of them and got a splash of ink. They are stored as they should be stored but I've opened too many messy markers.

 The alpha used in the Home Sweet Home file was a font I converted. I must say, converting fonts can be more than tedious. After all of the work I placed into creating this alpha...ding dong...nobody was at home because I left out the lower case "d". The line are alpha is shared here on my blog but currently (until I have time to fix it) it's missing the lower case "d'.

I hope you can use and enjoy this set of sketches and the bumble bee print and cut. You can download the entire set which includes all of the files mentioned which all are in .svg,.dxf, and Studio formats if you click
------> HERE


Saturday, April 13, 2013

The Crafty Card Woods are Filled with Bears and Owls

A dear friend of mine made this bear card and inspired me to make a cutting file. She cuts everything by hand and enjoys every moment. Her scissor cutting skills amaze me! I think this card is beary cute.....pun intended...lol. I can't wait to use it for a special occasion. My granddaughter may be getting several birthday cards from her grandma this month...lol

I used Dick Blick chalks (they're nice chalks at a good price) to chalk the edges of the bear pieces. It is a dark chocolate brown on the edges. I used a golden brown for this inside of the ears and a dark pink for the rosy cheeks. The lines which look like stitching was made with a white gel pen. The highlights of the eyes and nose are also don with the white gel pen. The eyelashes and mouth were drawn on with a black Micron pen.

The next card is a cute little owl card I designed in Studio.In the cutting file you'll find a little square piece with a perforated line down the middle. this little piece needs to glued in the center where the card will fold. It will make it stronger. First cut out the card shape on some brown paper then do a print and cut of the owl and glue it to the front of the card. the white owl shaped piece is for the inside of the card.

Both cards are in three formats, .png, .svg, and Studio. You can download the Bear Cutie Card HERE

You can download the Owl Card HERE


Thursday, April 11, 2013

Gazebo Tea Light Holder

Here's a file I thought I had shared then realized I didn't when I was working on organizing the Silhouette Plus forum "Freebie Cutting Files" forum. I hope this cutting file will light your lovely Spring and Summer night. Hugs, Debbie

UPDATE ****You can now download zipped file with .svg,.dxf, and Studio files ------> Gazebo Tea Light Zipped File

* If you need this in .dxf or .svg format please let me know and I'll convert this file for you.

I made this Gazebo as a Print and Cut but you can always use your lovely papers.


Wednesday, April 10, 2013

Jumping Girl Cutting File and Instructions

My video recorder is on the blitz so I attempted to make instructions using my computer and the Studio software. I hope this video below helps to walk you through the steps of making this card. these are a lot of fun.

You can download the cutting files .svg,.dxf and Studio by clicking ----> HERE


Friday, April 5, 2013

My Husband's Closet and a Talented Lady

So many of us are blessed to find wonderful inspirations, talent sharing people, and new web friends. I would like to share one fun card one very talented, sharing, creative woman from the Silhouette Plus forum and her blog Susans Craft Corner. Susan designed this wonderful kinetic card which will bring magic to anyone receiving it. The beer can be a cola, wine, or any other beverage of your choice just by making a few changes. I have an uncle whom is now retired . He was a representative for beer containers. I thought he would love to get this card.

If you would like to grab this file please visit Susan's blog. She updated this wonderful cutting file to include instructions. I'm pretty familiar with kinetic cards and I couldn't wait to make it so I made some modifications and winged it. Her instructions are great. You will have a fun card made in no time at all. Please don't forget to leave Susan some blog love and appreciation for all of her kindness and generosity.


Next, I want to share a real quick and cute project in honor of National Earth Month.It's the time of month to recycle and re-purpose those almost to the waste bin things.

 My husband was cleaning out his closet. I watched him heading towards the recycle bin and my eye brows raised and eyes popped wide open. This was crafting stuff in the making. He surrendered the jeans. It was time to get down to some crafty business. After all, I had to show him the potential of his worn out jeans. 

First, I cut out the pockets making sure to cut them close to the edges. After they were neatly cut out, I traced the shapes of them on some chipboard and cut the chipboard. Next, I added the ribbon hanger and trim to the pocket with hot glue. I could have used some fabric glue on the front bu I have this love hate thing going on with my glue gun...lol. It's like I challenge it to burn me again. After I added the ribbon I hot glued the chipboard on the back of the pockets, embellished it with some of the Jolee's Boutique dimensional stickers by EKsuccess, a Prima flower, and in the center of the flower I added a pretty yellow rhinestone. We need that bit of bling wherever we can get it. Last, I cut out the Levi tag on the back of the jeans to give it that something little extra.

They hang nicely on a magnetic hook or you can tap in a nail and hang it wherever you want and place anything you would like right into the snug little pocket. 

One more little thing I wanted to share about a recent purchase. I was fortunate to have a 50% off coupon from Michaels so I bought the Aleene's Ultimate Glue gun. I wanted to have a glue gun with various tips since I use a glue gun a whole lot. The problem with this neat glue gun is changing the tips. I swear, you need the strength of a gorilla to get the tips off. My husband jumped in to help and had to get another wrench to hold onto the back portion as he turned the front. The other thing that made this hot glue gun not too "Debbie" friendly is the fact that you have to change the tips while the glue gun is still hot. Really! I thought. With my record burns and mishaps this was a bit scary and can be dangerous. With all of this said; if I can get past the fear of changing the tips, me and Alleen's Ultimate glue gun may have a long and lasting relationship. I really love having the various tips and adore the handle grip that squishes the glue out. It's much more hand friendly than the trigger type of glue guns. If you decided to take the plunge and buy one of these nifty but naughty glue guns; don't forget to wait for a coupon. Without a coupon they are pricey.


Thursday, April 4, 2013

A Burst of Clouds and Birds and Loving You This Much

Today, I wanted to share some card ideas I've been working on. The cards pictured are just the prototypes I've made. I have a thing about trying to perfect cutting files. You should see all of the scraps from these two projects...lol.

The little girl, the clouds, and the birds I drew in Studio. When you pull on the tab her arms open wide to send hugs. The blue birds in the clouds fold nicely into the inside of the card but when it's opened up pops a burst of clouds and blue birds. I used my Copics to color the edge of the clouds.

Here's a little peek of the prototypes and the Jumping Girl. I can design her to where both the legs and arms move but the arms moving look like she is saying; "I love you this much!". I'm hoping to have them perfected soon. My main problem is getting the time to make a video tutorial for both cards.


Wednesday, April 3, 2013

Vase Filler Glass Beads, Ball Jars, and Bows

UPDATE ** After two weeks of the filler beads jar sitting outside in the various temperature changes; I discovered the hot glued beads began to fall off. I re-made the jar by using E600 glue.

More little pint Ball jars were laying around begging me to do something with them. Good thing, because I came across a bunch of vase filler glass beads. This made me go hmmmm..... then the next thing I knew my trusty ol' glue gun was in hand and ready to get into some crafty action. Adding a dab of hot glue on the backs of each glass bead I placed them on the jar and lid. The one thing I wish I would have done first was to glue the solar light into the ring and place the vinyl before I added the glass beads to the rim of the lid ring. The other thing I wish I would have done was to pay more attention to how I was holding one of the glue covered beads. After adding a dab of hot glue to one of the glass beads I somehow flipped the glass bead and it landed on top of my right thumb. This had me doing one kind of crazy dance then running to the sink to turn on the cold water. Before I made it to the sink it fell off taking some skin with it and leaving a bubbled up raw looking place on my thumb. My husband has seen me do this dance before so he just called out; "Are you alright?" I answered him by saying; "I'm okay but my thumb is a bit irritated with the glue gun but, I'm sure getting the "hot glue gun dance" down real well. I can now enter a competition." I said, I love my glue gun but I never said it loved me back....lol.

Now that the drama of the "Attack of the Hot Glue Gun" is over I wanted to dress up this gorgeous jar a little more. Silhouette cutting machine time! I made a pattern to cover the solar light then did a test cut on some card stock. It was a perfect match so I grabbed some indoor/outdoor vinyl and made a cover for the solar light. I do wish I would have placed this on the lid before I placed the glass beads but it was an after thought.Since it was an after thought; I didn't line the vinyl up too well but it still looks okay. 

This glass bead covered Ball jar is truly gorgeous. I wish the pictures would show how lovely it really is. These are definitely going to be on my gifts to make for giving list. 

In this blog post I'm adding one more crafty thing. I made my youngest and eldest granddaughters some bows. They turned out so cute, I just had to share. The bee bow is my favorite. I used Jolee's Boutique dimensional stickers. They are made of plastic and are durable. Michaels craft store has so many to choose from. I bought the bees and flowers, strawberries, ladybugs, and there are more I would like to get.

I hope these little crafts provide some crafty inspiration. Have a blessing filled day and happy crafting! 


Ball Jar Lid with Vinyl over


Glass Bead Ball not Lit


My attempt to get a picture of the Ball Jar lit


Hair Bows


Monday, April 1, 2013

You Light Up My Life

Solar power lights were the next best invention since chocolate chips. With some energy from the sun they light up our gardens, paths, sun porches and more.

I already wrote a tutorial on how to make some lovely garden/deck/ porch lights. After reading a post one of my clever friends on the Silhouette Plus forum wrote we ended up having quite a bit of conversation about these great little lights. She uses them as night lights and to light her Silhouette Cameo made luminaries. Later, she sent me  a link to some jar lids that could be purchased at $10.99 a lid....whew! not for this frugal crafter. I grabbed one of the solar lights I had laying around, grabbed a Ball jar and tried to see if it would fit into the ring of the jar. Alas, none of the ones I had on hand would fit into the Ball ring lid openings. I didn't give up. Next, I found a Kerr jar. They have larger ring lid openings...tada! with adding just a little grosgrain ribbon to the edge of the solar light; it fit nicely into the ring lid of the Kerr jar.

I love the old Blue Ball Jars a dear friend of mine gave me and I want to make some nice screw on lids for all of them I had some pint Ball jars laying around so I thought I would use them for experimenting. Today, I went to Walmart with the Ball ring lid stashed in my purse. I found a $1.97 solar light which fit almost perfect inside the opening. When I returned home, I plugged in my trusty hot glue gun, grabbed a snip of grosgrain ribbon and began my experimentation.

First I unscrewed the solar light so I would just have the light portion of the solar light. I hot glued the ribbon around the edge of the light. The next step was to place some hot glue around the ribbon edged light and fit it into the Ball ring lid. Be extra careful on this part. You want it to be as level as you can get it. Another...TADA! it will fit nice and snug and is ready for you to screw the lid to the top of the jar and do some embellishing. I have a bunch of this and thats laying around so I grabbed snips of ribbon, lace, flower petals, Christmas and Mardi Gras beads and hot glued away. Hot glue guns are the next best thing to solar lights. :)

Are you ready to light up your life. Well, how about a night light for your bathroom, bedroom, or some other room you just want or need a little light. I have so many blue Bar jar lights on my screened in porch; my daughter says it looks like fairy land. I hardly ever turn on the porch light when I sit out there in the night time hours.

The great thing about making these lights with the screw on lids is; you can make them your own with your choice of embellishments. The lids are a part of the jar so you don't have to pay something like $10.99 for a lid. You can get the solar lights for very little and save a little on your electric bill.


Lid Close-Up


Kerr Jar with larger light


Ball Jar with smaller light but the same brightness


Kerr Jar Experiment 1