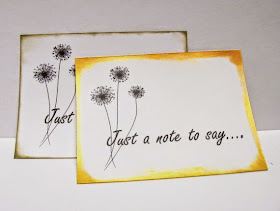
After I made the previous video I had some emails and comments asking how to go about cutting card covers or card inserts so the words or images would only print and not cut. This video will walk you through the easy steps using "Cut by Layers" for those with the Studio Designer Edition and "Cut by Line Color" for those with the basic edition. I hope this will be helpful for those of you who are just now installing the Studio 3.0 software.
Below the video are the inserts I cut in Studio 3.0. You can see I did this quickly by the messing inking I did...lol
Below the video are the inserts I cut in Studio 3.0. You can see I did this quickly by the messing inking I did...lol


Hi Debbie, thanks for all the effort you and the other users are putting in re v3.0. I've just had a problem re print & cut that I've never come across before. Trying to print blocks of colour then cut out butterflies from them but when printing parts of the colour blocks are missing. I tried printing twice and different parts were missed each time, 2nd time around was worse with bits missing from each block. Any ideas what I can try? Any help would be most appreciated...thanks
ReplyDeleteHi Pam, I haven't tried doing this but when I have a moment I'll see i the same thing is happening when I try this.I'm using Windows 7. What operating system are you using?
ReplyDeleteI have Windows 7 as well. I've tried turning PC of and in again but no use. It's not the printer as I eventually managed to managed to print out the colour blocks perfectly from my laptop (also Win 7) using another programme. I've still to try hooking the cameo up to my laptop and trying that but it's bedtime here in Scotland so that's something for tomorrow. I'll let you know if I have the same problem via the laptop and v3.0
DeleteHi Pam, sadly their are several bugs in this program. Some with Mac comouter are having different issues than PC users and some PC users are having different isssues than other PC users. I'm sure Silhouette will get his issue fixed soon.
DeleteAnother great tutorial Debbie,thanks so much.
ReplyDeleteBlessings Jocelan
Thanks Debbie. If you set up the first image in layers to print and cut, can you just duplicate that image and it automatically go into layers like the first? Many times,I print and cut 20 or more images on a page and I can't image doing each one into layers, too time consuming for me! I am waiting to download the software until I see some of these issues resolved. Thanks for your tutorials!
ReplyDeleteHi Trish, when using layers you can keep all "Print and Cuts" on one layer. If you duplicate it 20 times it will be on one layer 20 times. If you want to place some of your duplicates on a second layer because you want them to have say; different conditions like "Cut Edge" you can place those on a second layer by creating a second layer and dragging the images you wnat cut under those conditions. I hope I explained this well enough an hope to be able to make some more videos real soon. I'm so much better with "Show" than I am with "Tell"....lol Hugs, Debbie
ReplyDeleteThank you Debbie! You are great with both tell and show! I think Silhouette has become your full time job these days. And you are greatly appreciated!
DeleteTrish, Thank you for the appreciation. I really enjoy helping out.I think my husband is thinking the same thing about this being a full time job...lol
DeleteThank you so much for sharing!
ReplyDelete